

Creating a website with Hostinger is simple and efficient. First, choose a hosting plan.
Next, set up your domain and start building. Hostinger is popular for its user-friendly interface and affordable plans. Whether you’re a beginner or experienced, Hostinger offers the tools you need. Building a website might seem daunting, but Hostinger makes it easy.
Their platform guides you through each step. From selecting a domain to designing your site, the process is streamlined. In this blog post, you’ll learn how to create a website with Hostinger. We will cover everything from choosing the right plan to publishing your site. By the end, you’ll be ready to launch your website confidently. Let’s get started!
Introduction To Website Creation
Creating a website is a vital step for any business or personal brand. It helps you connect with a global audience and showcase your work or services. With the right tools, building a website can be simple and efficient. Hostinger is one of the platforms that make this process easier. Let’s dive into the basics of website creation with Hostinger.
Importance Of A Website
A website is your digital storefront. It allows potential customers to find you online. It also builds credibility and trust. A well-designed website can enhance your brand image. It is a platform to share information and engage with your audience. Without a website, you might miss out on many opportunities.
Why Choose Hostinger
Hostinger offers user-friendly tools for website creation. Their platform is affordable and reliable. Hostinger provides excellent customer support. They have a range of templates to suit different needs. Even beginners can create professional websites with ease. Hostinger’s hosting services ensure your website runs smoothly. They also offer strong security features to protect your site.
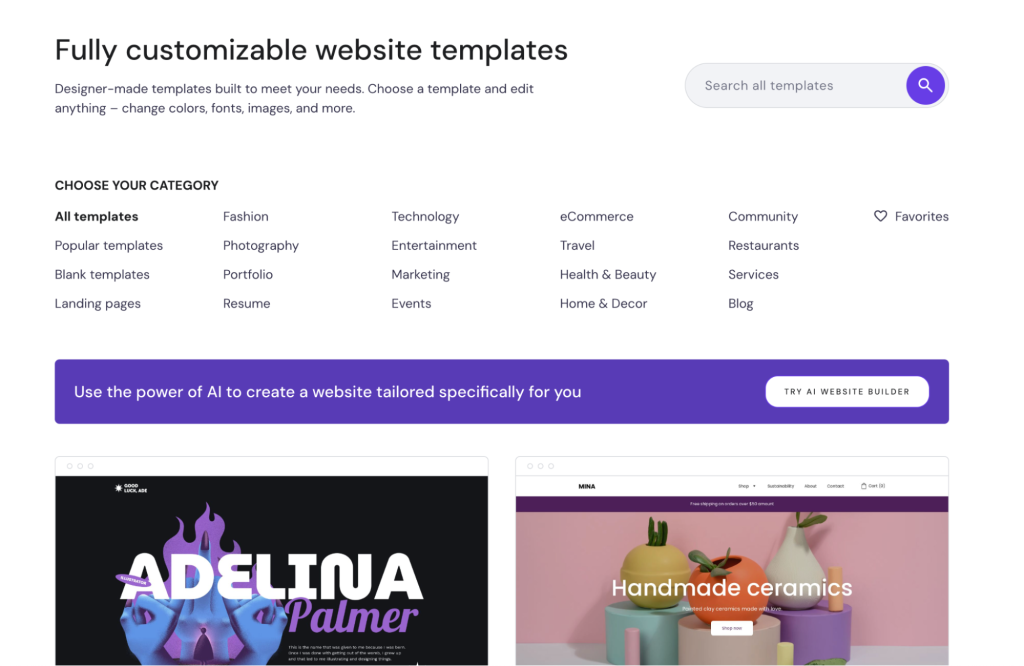
Credit: www.hostinger.com
Choosing The Right Hosting Plan
Choosing the right hosting plan is crucial for your website’s success. Hostinger offers various hosting solutions to match different needs and budgets. Understanding each option will help you make an informed decision.
Shared Hosting
Shared hosting is ideal for beginners and small websites. With this plan, multiple websites share the same server resources. It is cost-effective and easy to manage.
- Affordable: Shared hosting is the least expensive option.
- User-friendly: Easy to set up with minimal technical knowledge.
- Limited Resources: Shared resources can affect performance if traffic spikes.
Vps Hosting
VPS (Virtual Private Server) hosting offers more control and resources. It is suitable for growing websites with higher traffic and specific needs.
- More Control: You get root access to configure the server.
- Scalable: Easily upgrade resources as your website grows.
- Better Performance: Dedicated resources ensure consistent performance.
Cloud Hosting
Cloud hosting provides high performance and reliability. It uses multiple servers to balance the load and maximize uptime.
- High Uptime: Less downtime due to multiple servers.
- Scalable: Easily scale resources up or down.
- Cost-effective: Pay only for the resources you use.
Here’s a quick comparison table to help you decide:
| Feature | Shared Hosting | VPS Hosting | Cloud Hosting |
|---|---|---|---|
| Cost | Low | Medium | Variable |
| Performance | Basic | High | Very High |
| Scalability | Limited | High | Very High |
| Technical Knowledge | Low | Medium | Medium |
Registering A Domain
Before you can build your website on Hostinger, you need a domain. A domain is your website’s address on the internet. This section will help you understand how to register a domain. We will cover two main parts: selecting a domain name and the domain registration process.
Selecting A Domain Name
Your domain name is crucial. It represents your brand. It must be unique and easy to remember.
- Keep it short: A short domain name is easier to type and recall.
- Use keywords: Include keywords related to your business.
- Avoid numbers and hyphens: They can confuse users.
- Choose the right extension: Common ones are .com, .net, and .org.
Spend time brainstorming. Check for availability using Hostinger’s domain checker.
Domain Registration Process
Once you have a domain name, you need to register it. Here’s a step-by-step guide:
- Go to Hostinger: Visit Hostinger’s website and log in.
- Use the domain checker: Enter your chosen domain name to check its availability.
- Select your domain: If available, add it to your cart.
- Choose a plan: Select a suitable hosting plan. Hostinger offers various options.
- Fill in your details: Provide your contact information and payment details.
- Complete the purchase: Review and confirm your order. Hostinger will handle the rest.
After purchase, your domain is registered. You can now start building your website.
Setting Up Your Hostinger Account
Creating a website starts with setting up your Hostinger account. This guide will help you through the steps to make the process easy and quick. Let’s dive into the details.
Creating An Account
First, visit the Hostinger website. Click on the Sign Up button at the top right corner. You will see a registration form. Fill in your details such as:
- Email Address
- Password
After entering your information, click on the Create Account button. Hostinger will send a verification email. Check your inbox and click the verification link to activate your account.
Navigating The Dashboard
Once your account is active, log in to the Hostinger dashboard. The dashboard is user-friendly and has several features. Here are some key sections you will find:
| Section | Description |
|---|---|
| Home | Overview of your account and services. |
| Hosting | Manage your websites and domains. |
| Emails | Set up and manage email accounts. |
| Billing | View and manage your invoices and payments. |
| Support | Contact support and access help resources. |
Spend some time exploring these sections. It will help you get familiar with the tools and features available. If you need help, Hostinger provides a knowledge base and customer support.
Installing A Content Management System
Creating a website with Hostinger is easy. Installing a Content Management System (CMS) is a key step. A CMS helps manage and create content without coding skills. Let’s look at how to install two popular CMSs: WordPress and Joomla.
WordPress Installation
WordPress is the most popular CMS. It powers over 40% of websites. Hostinger makes WordPress installation simple.
- Log in to your Hostinger account.
- Go to the hPanel.
- Click on Website, then Auto Installer.
- Select WordPress from the list.
- Fill in the required details:
- Site Name
- Admin Username
- Admin Password
- Admin Email
- Click Install. The installation process will begin.
Within a few minutes, WordPress will be ready. You can start customizing your site right away.
Joomla Installation
Joomla is another popular CMS. It offers flexibility and robust features. Installing Joomla on Hostinger is straightforward.
- Log in to your Hostinger account.
- Navigate to the hPanel.
- Click on Website, then Auto Installer.
- Select Joomla from the list.
- Provide the required details:
- Site Name
- Admin Username
- Admin Password
- Admin Email
- Click Install. The installation will start.
Joomla will be installed within a few minutes. You can then start building your website.
Credit: www.hostinger.com
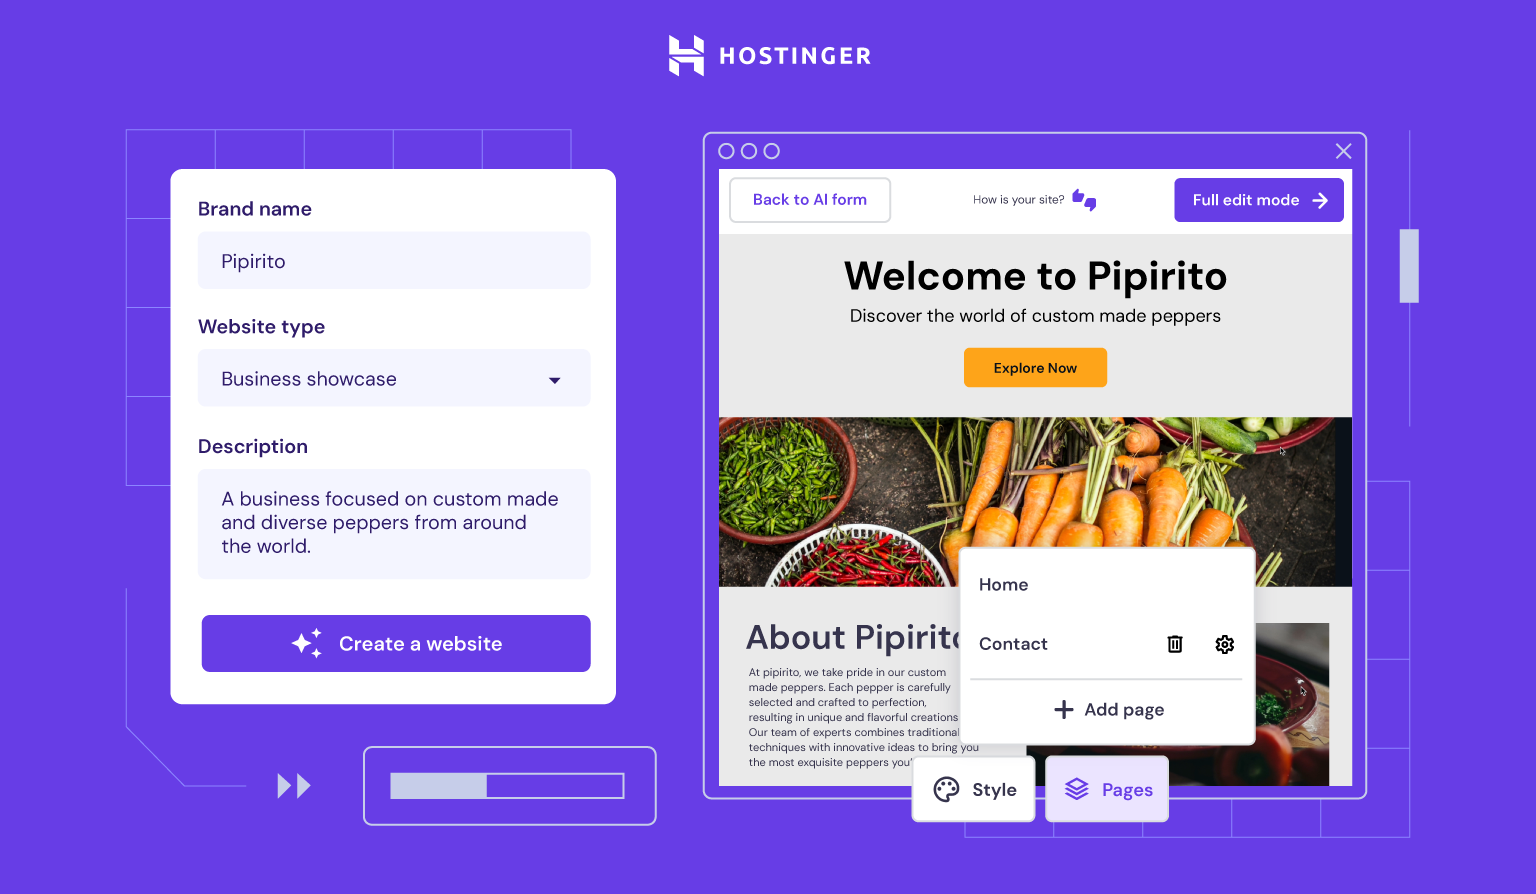
Designing Your Website
Creating a website with Hostinger is simple. Choose a hosting plan, register a domain, and use their website builder. Follow the step-by-step guide to customize your site.
Designing your website is a key step in creating a strong online presence. A good design makes your site user-friendly and visually appealing. With Hostinger, you have many tools to design your website easily.Choosing A Theme
Hostinger offers many themes to suit different needs. Whether you run a blog, store, or portfolio, you will find a theme that fits. Start by browsing through Hostinger’s theme library. Look for themes that match your brand and purpose. Pay attention to color schemes, font styles, and layout options. These elements should align with your brand identity.Customizing Your Design
Once you choose a theme, it’s time to make it your own. Hostinger’s easy-to-use tools let you customize your design without coding. Start with the header. Add your logo and choose a header style that stands out. Next, customize your homepage. Add sections that highlight key information about your business. Use images, text, and buttons to guide visitors. Pay attention to colors and fonts. Keep your design consistent with your brand. Use Hostinger’s built-in tools to adjust these elements. Make sure your site is mobile-friendly. Test your design on different devices to ensure it looks good everywhere. Remember, a simple and clean design often works best. Avoid clutter and keep navigation straightforward. This ensures visitors can find what they need quickly.Adding Content To Your Website
Adding content to your website is a critical step. Content attracts visitors and keeps them engaged. With Hostinger, it’s easy to add content, whether you’re creating pages or publishing blog posts.
Creating Pages
Pages form the backbone of your website. They provide structure and essential information to visitors. Here’s how to create pages with Hostinger:
- Log in to your Hostinger account and navigate to your website dashboard.
- Go to the Pages section in the website builder.
- Click on the Add New Page button.
- Enter a title for your page. Keep it clear and relevant.
- Add content to your page. Use headings, paragraphs, images, and links.
- Click Save or Publish once you’re satisfied.
Keep your pages clean and organized. Use headings to break up text. Add images to make your content more engaging.
Publishing Blog Posts
Blog posts are key for engaging your audience. They also help with SEO. Here’s how to publish blog posts on Hostinger:
- Navigate to the Posts section in your Hostinger dashboard.
- Click on Add New Post.
- Enter a catchy title for your blog post.
- Write your content. Use short paragraphs and clear language.
- Add images or videos to make your post visually appealing.
- Use categories and tags to organize your post.
- Click Publish once you’re ready.
Regularly publishing blog posts keeps your website fresh. It also helps attract new visitors and improves your search engine ranking.
Optimizing Your Website
Creating a website with Hostinger is the first step. Optimizing your website is the next crucial phase. This part ensures your site runs efficiently and attracts more visitors. Let’s look at some essential optimization techniques.
Seo Best Practices
Optimizing your website for search engines is vital. Search Engine Optimization (SEO) helps your site rank higher on search engine results pages (SERPs). Here are some best practices to follow:
- Keyword Research: Use tools like Google Keyword Planner to find relevant keywords.
- Quality Content: Create valuable content that answers your audience’s questions.
- On-page SEO: Include keywords in titles, headings, and meta descriptions.
- Mobile-Friendly Design: Ensure your site is responsive on all devices.
- Backlinks: Obtain links from high-authority websites.
Following these practices can improve your site’s visibility and drive more traffic.
Improving Site Speed
Site speed is critical for user experience and SEO. A slow site can drive visitors away. Here are some tips to boost your site’s speed:
- Optimize Images: Compress images to reduce their file size.
- Minimize HTTP Requests: Reduce the number of elements on your pages.
- Enable Browser Caching: Store some data on users’ browsers to load pages faster.
- Use a Content Delivery Network (CDN): Distribute your content across multiple servers.
- Choose Fast Hosting: Hostinger offers plans that ensure quick load times.
A fast site keeps visitors engaged and improves your ranking on search engines.
Maintaining Your Website
After setting up your website with Hostinger, maintaining it is key. Regular maintenance ensures your website runs smoothly. It also keeps your visitors happy. Here are some essential steps to keep your site in top shape.
Regular Backups
Backups are crucial for website security. They help you restore your site if something goes wrong. Hostinger provides easy backup options.
| Backup Type | Frequency |
|---|---|
| Full Backup | Weekly |
| Database Backup | Daily |
Follow these steps to create a backup:
- Log in to your Hostinger account.
- Navigate to the “Backups” section.
- Select “Create Backup”.
- Choose the type of backup you need.
- Click “Start Backup”.
Always store your backups in a safe place. Use external storage or cloud services.
Updating Plugins And Themes
Outdated plugins and themes can cause security issues. They might also slow down your website. Regular updates keep your site secure and fast.
Here’s how to update plugins and themes:
- Log in to your WordPress dashboard.
- Go to the “Plugins” section.
- Check for any available updates.
- Click “Update Now” for each plugin.
- Repeat the process in the “Themes” section.
Set a reminder to check for updates every week. This ensures your site stays current and secure.
Credit: www.youtube.com
Conclusion And Next Steps
Creating a website with Hostinger involves choosing a plan, selecting a domain, and using their website builder. Follow the steps to publish your site and start engaging your audience.
Creating a website with Hostinger opens many possibilities. You’ve set up your domain, chosen a template, and added content. But what’s next? This section guides you through the final steps.Launching Your Site
Check everything before launch. Review your content for errors. Ensure all links work. Test the site on different devices. Once satisfied, go to Hostinger’s control panel. Find the ‘Launch’ button and click it. Your site is now live. Share it with your audience.Future Enhancements
Websites need updates. Add new content regularly. This helps with SEO. Monitor your site’s performance. Hostinger provides tools for this. Use them to find areas to improve. You might need new features. Hostinger supports plugins for this. Keep your site secure. Update your software and plugins often.Frequently Asked Questions
How Do I Start Creating A Website With Hostinger?
To start, sign up for a Hostinger account. Choose a hosting plan, register a domain, and use the website builder or WordPress.
Is Hostinger Good For Beginners?
Yes, Hostinger is great for beginners. It offers an easy-to-use interface, website builder, and 24/7 support to assist you.
What Website Builder Does Hostinger Offer?
Hostinger provides its own website builder, which is user-friendly. It also supports popular CMS platforms like WordPress, Joomla, and Drupal.
How Much Does It Cost To Create A Website With Hostinger?
Hostinger offers affordable plans starting at just a few dollars per month. Prices vary depending on the plan and features you choose.
Conclusion
Creating a website with Hostinger is simple and user-friendly. Follow the steps, and you’ll have your site live quickly. Hostinger offers reliable tools and support for beginners. Build your online presence today. It’s affordable and efficient. Happy website building!
