

Are you ready to launch your WordPress site with Hostinger and enjoy a seamless online presence? With Hostinger’s comprehensive hosting services, creating a website has never been easier.
Whether you’re a beginner or an experienced developer, Hostinger offers the tools and support you need to bring your digital vision to life. Imagine having a free domain, automatic website migration, and 24/7 customer support at your fingertips. Plus, with up to 75% off hosting plans, starting your website is not only simple but incredibly affordable.
In this guide, we’ll walk you through the straightforward process of installing WordPress on Hostinger. You’ll discover how to leverage their AI-powered website builder and secure hosting features to build a site that stands out. Dive in, and let’s turn your website dreams into reality!
Credit: www.hostinger.com
Introduction To WordPress And Hostinger
Creating a website is a vital step for anyone wishing to establish an online presence. WordPress offers a powerful platform for building websites, while Hostinger provides the hosting services to make it accessible to the world. Understanding the basics of WordPress and Hostinger can significantly enhance your website creation process.
Why Choose WordPress For Your Website
WordPress is known for its flexibility and ease of use, making it a preferred choice for many website owners. Here are some reasons why WordPress stands out:
- User-Friendly Interface: Even beginners can navigate its intuitive dashboard.
- Customizable Themes: Thousands of free and premium themes allow for unique designs.
- Plugins for Functionality: Extend capabilities with plugins for SEO, e-commerce, and more.
- SEO Optimization: Built-in features help improve search engine rankings.
WordPress is not only versatile but also supports a wide range of website types, from blogs to online stores.
Benefits Of Using Hostinger As Your Hosting Provider
Hostinger offers a range of features that make it an ideal partner for hosting your WordPress site:
| Feature | Details |
|---|---|
| AI Website Builder | Create websites effortlessly with AI-driven tools. |
| Free Domain Registration | Get a free domain to kickstart your online journey. |
| Automatic Website Migration | Transfer your existing website seamlessly. |
| 24/7 Customer Support | Expert help available around the clock. |
| Managed Hosting for WordPress | Specialized hosting to optimize WordPress performance. |
Hostinger’s commitment to speed and security ensures your website runs smoothly. Their services are trusted by over 3 million website owners worldwide, proving their reliability.
With up to 75% off hosting plans and a 30-day money-back guarantee, Hostinger provides an affordable and risk-free way to start your website journey.
Preparing For Installation
Before installing WordPress on Hostinger, preparation is key. Ensuring you have everything ready makes the process smoother. This section will guide you through the necessary steps for a successful installation.
What You Need Before Starting
- Domain Name: Make sure you have a registered domain. Hostinger offers free domain registration with certain plans.
- Web Hosting Plan: Choose a Hostinger plan that suits your needs. Options include Premium, Business, and Cloud Startup plans.
- Login Credentials: Have your Hostinger account details ready for quick access.
- SSL Certificate: Hostinger provides unlimited free SSL certificates for secure connections.
Setting Up Your Hostinger Account
Begin by creating your Hostinger account. Follow these easy steps:
- Visit the Hostinger Website: Go to Hostinger and click on ‘Sign Up’.
- Choose a Plan: Select a plan offering features like AI Website Builder and 24/7 support.
- Create an Account: Enter your email and set a password. Alternatively, use social media accounts for faster registration.
- Payment: Complete the purchase using a preferred payment method. Hostinger provides a 30-day money-back guarantee.
After setting up, access your Hostinger dashboard to manage website settings easily.
Step-by-step Guide To Installing WordPress On Hostinger
Installing WordPress on Hostinger is a straightforward process. Hostinger’s user-friendly interface makes it easy for beginners to set up their website. Follow this guide to get your WordPress site running smoothly.
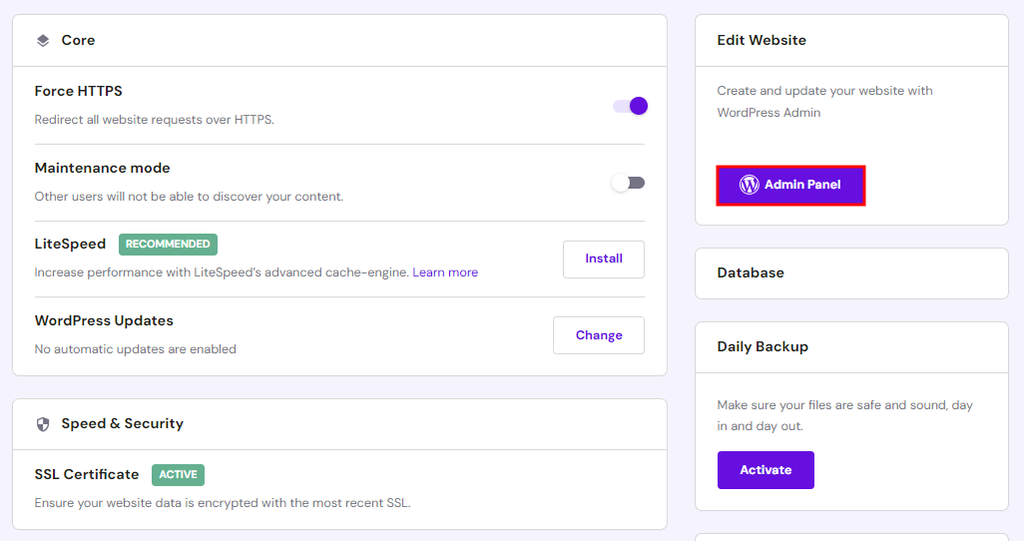
Accessing The Hostinger Control Panel
First, log in to your Hostinger account. Once logged in, navigate to the Control Panel. The control panel is your dashboard for managing all hosting services. You will find various tools and features here, including the Auto Installer.
In the control panel, locate the Hosting section. Click on the hosting account where you want to install WordPress. This will take you to the hosting management interface.
Using The Auto Installer Tool
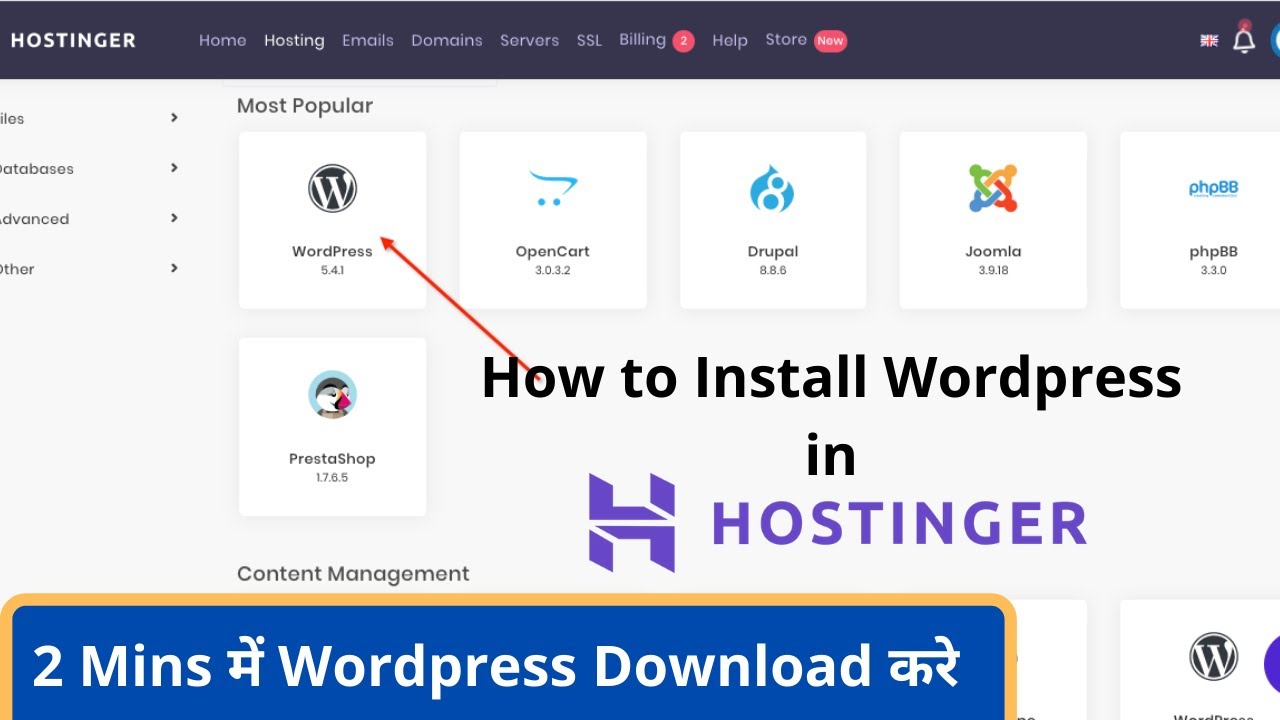
Hostinger offers an Auto Installer tool to simplify the installation process. In the control panel, find the Website section. Click on the Auto Installer option. This tool automates the WordPress installation, saving you time and effort.
Select WordPress from the list of applications. Click on it, and you will be prompted to enter some basic information. Fill in your Website URL, Administrator Username, and Password. Ensure these details are secure and memorable.
Configuring WordPress Settings
Once WordPress is installed, you need to configure the settings. Access your WordPress dashboard by visiting yourdomain.com/wp-admin. Use the credentials you created earlier to log in.
In the dashboard, configure essential settings for your site. Under Settings, you can set your Site Title, Tagline, and Timezone. Adjust the Permalinks structure to enhance SEO. Choose Post Name for a clean URL structure.
Don’t forget to choose a suitable theme and install essential plugins to extend functionality. Explore Hostinger’s AI SEO Ready features to optimize your site further.
Credit: m.youtube.com
Customizing Your WordPress Site
After installing WordPress on Hostinger, the next step is customization. Customization helps your site reflect your style and meet your audience’s needs. This guide will walk you through choosing themes and essential plugins. Let’s make your WordPress site unique and functional.
Choosing And Installing Themes
Themes change the look and feel of your WordPress site. They affect layout, colors, and fonts. Here’s how you can choose and install a theme:
- Log in to your WordPress dashboard.
- Navigate to Appearance > Themes.
- Click on Add New to explore available themes.
- Use filters or search for specific themes.
- Preview themes to see how they look on your site.
- Click Install and then Activate to apply your chosen theme.
Choosing a responsive theme ensures your site looks great on all devices. Consider themes that are SEO-friendly and lightweight for better performance.
Installing Essential Plugins For Functionality
Plugins add features and functionalities to your WordPress site. Here are some essential plugins to consider:
- SEO Plugins – Improve your site’s visibility in search engines.
- Security Plugins – Protect your site from malware and hackers.
- Backup Plugins – Ensure you have regular site backups.
- Performance Plugins – Enhance site speed and efficiency.
- Contact Form Plugins – Allow visitors to reach you easily.
To install a plugin:
- Go to your WordPress dashboard.
- Navigate to Plugins > Add New.
- Search for the plugin you want.
- Click Install Now and then Activate.
Always keep plugins updated for security and performance. Too many plugins can slow down your site, so choose wisely.
Troubleshooting Common Installation Issues
Installing WordPress on Hostinger can be straightforward, but sometimes issues arise during the process. Understanding these common installation challenges can help you resolve them efficiently. In this section, we explore common errors and where to find help and support.
Resolving Common Errors
When installing WordPress, users might encounter several errors. Here are some common ones and their solutions:
- Error Establishing Database Connection: This typically occurs due to incorrect database credentials. Ensure your database name, username, and password are correct. Use
phpMyAdminto verify these details. - White Screen of Death: This can result from plugin conflicts or memory issues. Deactivate all plugins and increase your
PHP memory limitin thewp-config.phpfile. - 404 Errors: These errors may arise when permalinks are misconfigured. Navigate to Settings > Permalinks and save changes to reset them.
Consult the Hostinger knowledge base for detailed solutions.
Where To Find Help And Support
Hostinger offers comprehensive support options for resolving installation issues. Here are a few resources:
- 24/7 Customer Support: Hostinger provides round-the-clock assistance via live chat. Their multilingual support ensures quick response times, typically under 2 minutes.
- Knowledge Base: Hostinger’s extensive library of articles and guides helps troubleshoot a variety of issues. Visit their knowledge base for step-by-step instructions.
- Community Forums: Engage with other users to find solutions and share experiences. This collaborative environment can be invaluable for troubleshooting.
Explore these resources for efficient problem-solving during the WordPress installation process on Hostinger.
Credit: bloggerspassion.com
Frequently Asked Questions
How Do I Add A WordPress Site To Hostinger?
Log into Hostinger’s hPanel. Select “Website” and click “Auto Installer. ” Choose WordPress, input your domain and credentials, then install. Access your WordPress dashboard via provided link.
How To Install WordPress.org On Hostinger?
To install WordPress. org on Hostinger, first log into your Hostinger account. Use the Auto Installer tool in the hPanel. Select WordPress, then fill in the necessary details. Click “Install” to begin. Access your WordPress dashboard through the provided link after installation completes.
Does WordPress Work With Hostinger?
Yes, WordPress works seamlessly with Hostinger. Hostinger offers one-click WordPress installation and optimized hosting plans. Their services ensure fast loading times, reliable uptime, and user-friendly management. Hostinger’s support team assists with any WordPress-related issues. It’s a great choice for WordPress sites.
How Do I Install WordPress On My Hosting Server?
Begin by downloading WordPress from wordpress. org. Upload the files to your server via FTP. Create a MySQL database and user. Run the WordPress installation script by visiting your domain. Fill out the necessary information, and click ‘Install WordPress’ to finish.
Conclusion
Installing WordPress on Hostinger is straightforward and efficient. With Hostinger’s user-friendly interface, even beginners can set up a site quickly. Their AI-powered website builder and free domain registration simplify the process. Plus, Hostinger offers reliable support and robust features. You get free automatic website migration and 24/7 customer support.
This ensures a smooth experience. Hostinger provides excellent value with its hosting plans. Discounts and a 30-day money-back guarantee give peace of mind. Start building your website today with Hostinger. It’s a smart choice for anyone looking to create a strong online presence.
