

Want to make your Bluehost WordPress site live? It’s easier than you think.
With a few steps, your website can be online in no time. Starting a website can feel overwhelming. You’ve picked Bluehost for hosting and WordPress for your site. Great choices! But now you face the challenge of going live. Don’t worry.
This guide will walk you through the process. You’ll learn each step to make your site visible to the world. Whether you’re a beginner or have some experience, this simple guide will help. Follow along, and your Bluehost WordPress site will be live and ready for visitors soon. Let’s dive in!

Credit: www.youtube.com
Setting Up Your Bluehost Account
Creating your Bluehost account is the first step to making your WordPress site live. This process is straightforward and involves a few key steps. Below, we’ll walk you through each part to ensure your site is up and running quickly.
Choosing A Hosting Plan
Bluehost offers several hosting plans. It’s important to choose the right one for your needs.
- Basic Plan: Suitable for small websites. It includes 50 GB of storage, one website, and a free domain for the first year.
- Plus Plan: Ideal for multiple websites. It offers unlimited storage, websites, and domains.
- Choice Plus Plan: Includes all Plus features and adds domain privacy and backup features.
- Pro Plan: Provides high performance and includes all Choice Plus features with additional resources.
Pick a plan that fits your website goals and budget. Ensure the plan has the features you need.
Registering A Domain
After choosing your hosting plan, the next step is to register a domain.
- Enter your desired domain name: Type in the name you want for your website.
- Check availability: Bluehost will check if the domain is available. If not, it will suggest alternatives.
- Choose a domain extension: Common options include .com, .net, and .org. Pick one that suits your site.
- Complete registration: Fill in your contact details and confirm the registration.
If you already own a domain, you can use it with your new hosting plan. Simply select the option to use an existing domain.
With your hosting plan and domain registered, you are now ready to install WordPress and begin building your site.
Credit: www.bluehost.com
Installing WordPress
Setting up your WordPress site on Bluehost is a straightforward process. Installing WordPress is the next step after purchasing your hosting plan. This step-by-step guide will help you get your site live quickly.
Accessing The Bluehost Dashboard
First, log in to your Bluehost account. Use your username and password. Once logged in, you will see the dashboard. This is the control center for your hosting account. Here, you can manage all your settings and services.
One-click WordPress Installation
Bluehost makes it easy to install WordPress. In the dashboard, find the ‘My Sites’ tab. Click on it. Then, click the ‘Create Site’ button. Follow the prompts to set up your new site. Enter your site name and tagline. Click ‘Next’. Choose the domain for your site. Click ‘Next’ again. Bluehost will now install WordPress for you. This process takes a few minutes. Once done, you will see a success message. Congratulations! Your WordPress site is now installed.
Configuring WordPress Settings
After setting up your Bluehost WordPress site, the next step is configuring WordPress settings. Proper settings ensure your site runs smoothly and is user-friendly. This will also help your site rank better on search engines.
Setting Up Permalinks
Permalinks are the URLs used for your posts and pages. They make your site more readable and SEO-friendly. Go to the WordPress dashboard. Click on “Settings” and then “Permalinks”. Select the “Post name” option. This structure is simple and clear. It helps search engines understand your content.
Configuring General Settings
General settings are the basic options for your site. Go to the WordPress dashboard. Click on “Settings” and then “General”. Fill in your site title and tagline. These are important for branding and SEO. Set your WordPress Address (URL) and Site Address (URL). Make sure they match your domain.
Choose the correct timezone for your location. This ensures your posts have the right time stamps. Set your preferred date and time format. This helps visitors understand your content better. Finally, choose your site’s default language. Save your changes.
Choosing And Installing A Theme
Making your Bluehost WordPress site live involves several steps. One of the most important is choosing and installing a theme. A theme sets the look and feel of your site. It can also affect its functionality. Let’s explore how to select and install the perfect theme for your WordPress site.
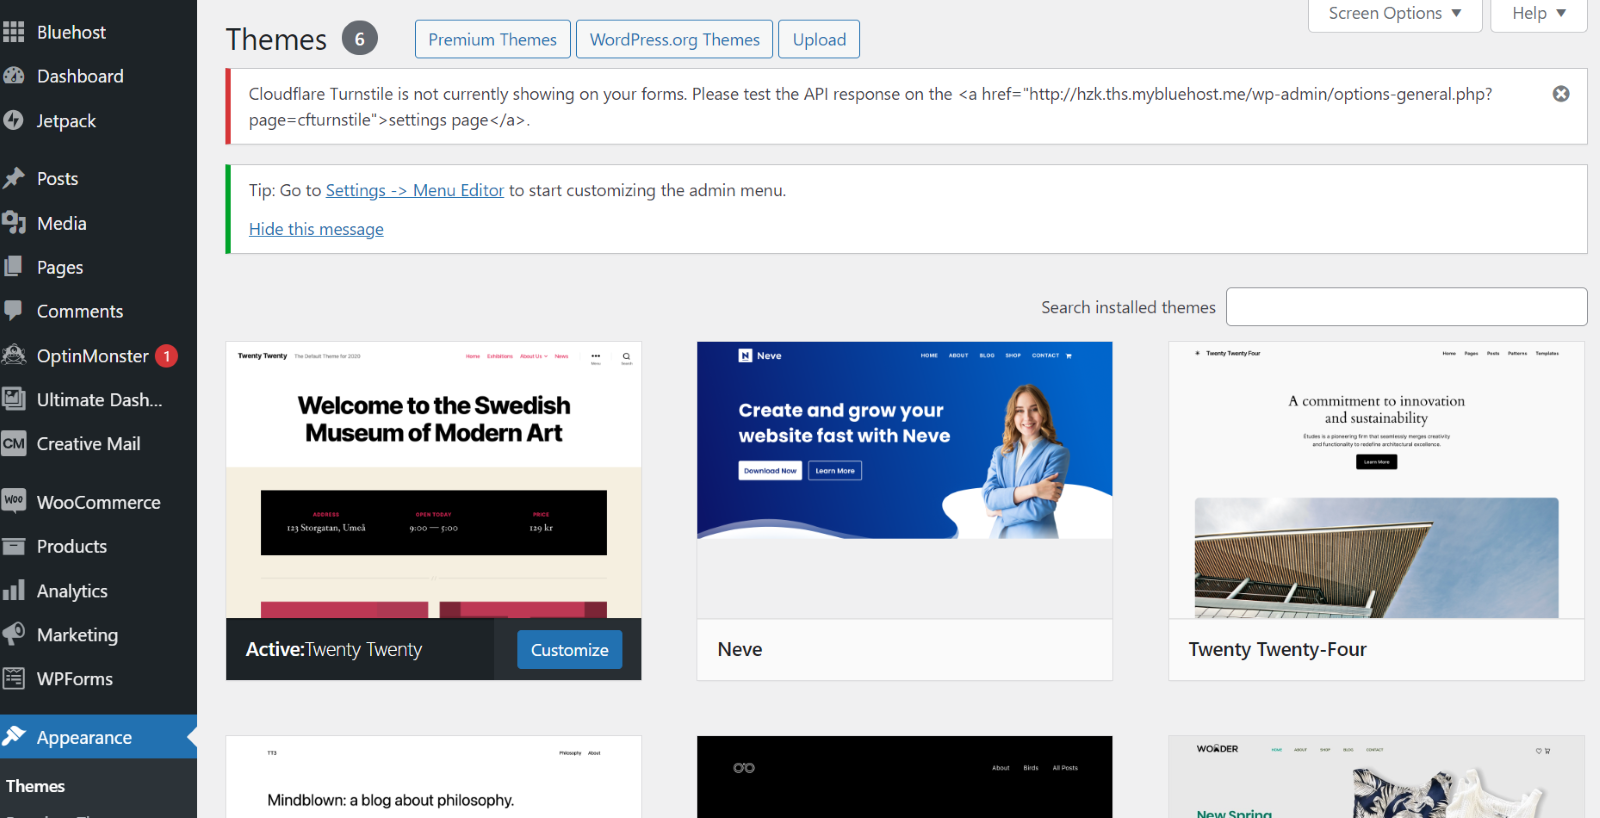
Browsing Themes In The WordPress Repository
The WordPress repository offers a wide range of themes. To browse, follow these steps:
- Log in to your WordPress dashboard.
- Navigate to Appearance > Themes.
- Click on Add New.
- Use the search bar to find themes.
Once you find a theme you like, hover over it. Click Install, then Activate. Your new theme is now live on your site.
Uploading A Purchased Theme
If you bought a theme from a third-party site, uploading it is simple:
- Download the theme’s .zip file.
- Go to your WordPress dashboard.
- Navigate to Appearance > Themes.
- Click on Add New, then Upload Theme.
- Choose the .zip file you downloaded and click Install Now.
- Once installed, click Activate.
Choosing the right theme is essential. It affects your site’s look and user experience. So, take your time and choose wisely.
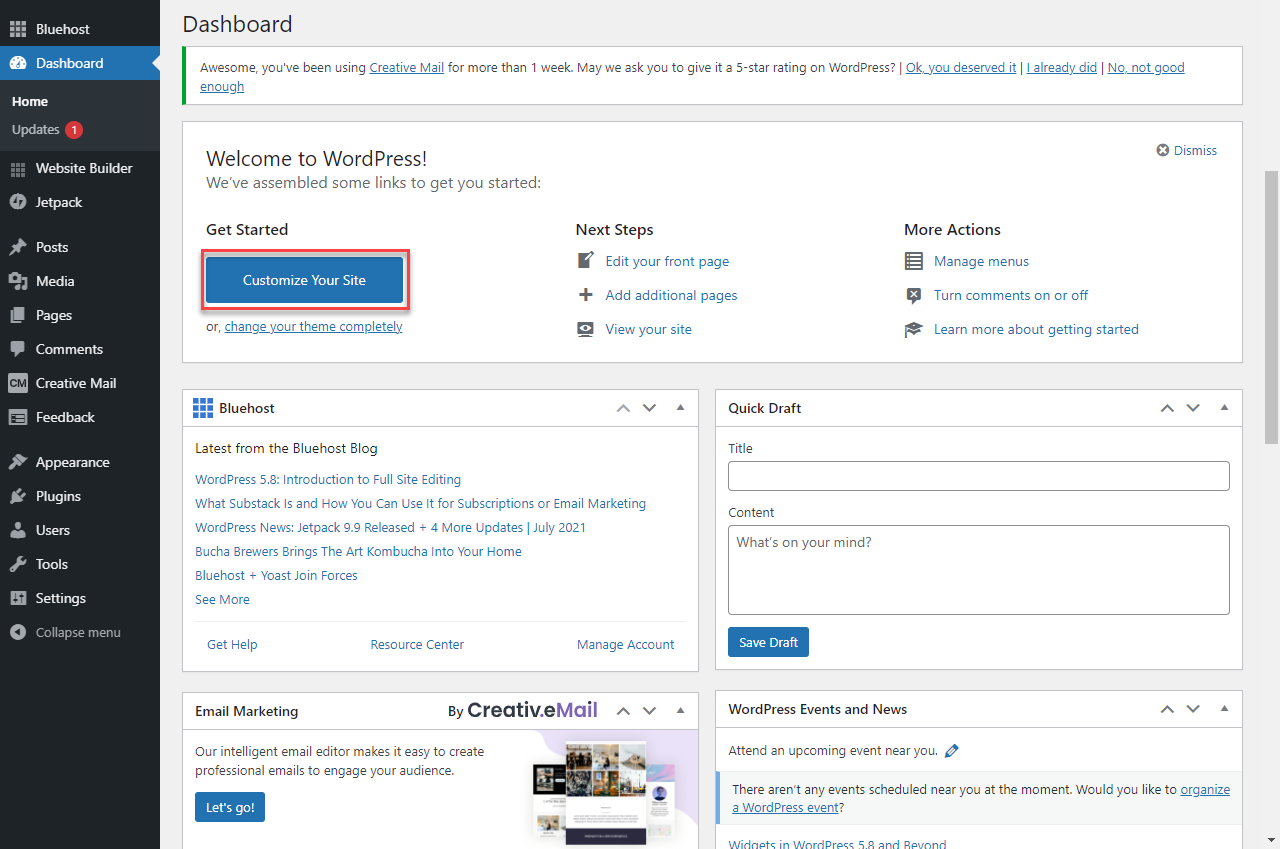
Customizing Your Site
Making your Bluehost WordPress site live is just the beginning. Customizing your site helps it stand out. Personalize it to reflect your brand and personality. This guide will help you use WordPress tools to make your site unique.
Using The WordPress Customizer
The WordPress Customizer is a powerful tool. It lets you tweak your site’s appearance. Access it from your dashboard. Go to “Appearance” and select “Customize.” Here, you can change your site’s title, tagline, and colors. You can also set your logo and background.
Preview changes in real-time. Adjust settings until you are satisfied. Once done, click “Publish” to make the changes live.
Adding Widgets And Menus
Widgets add functionality to your site. You can place them in your sidebar, footer, or other widget areas. Go to “Appearance” and select “Widgets.” Drag and drop widgets into your desired areas. Use widgets for recent posts, search bars, and more.
Menus help navigate your site. Create custom menus to organize your content. Go to “Appearance” and select “Menus.” Add pages, posts, and custom links. Arrange them by dragging and dropping. Save your menu and assign it to a location.
Credit: www.bluehost.com
Installing Essential Plugins
After setting up your Bluehost WordPress site, installing essential plugins is crucial. Plugins add extra features and enhance your site’s functionality. They help in optimizing your site for search engines, securing your site, and improving overall performance.
Seo Plugins
SEO plugins are vital for improving your website’s visibility on search engines. They help optimize your content, meta tags, and keywords. Here are some popular SEO plugins:
- Yoast SEO: This plugin offers easy-to-use tools for optimizing your content. It helps with meta descriptions, titles, and readability.
- All in One SEO Pack: Another powerful plugin, it provides sitemap support, Google Analytics integration, and more.
- Rank Math: This plugin offers advanced features like SEO analysis and keyword tracking.
Security Plugins
Securing your WordPress site is essential to protect it from threats. Security plugins help safeguard your site from malware, brute force attacks, and other vulnerabilities. Consider these security plugins:
- Wordfence Security: This plugin includes a firewall, malware scanner, and login security features.
- Sucuri Security: It offers malware scanning, security activity auditing, and website firewalls.
- iThemes Security: It provides over 30 ways to secure and protect your WordPress site.
Installing these essential plugins will ensure your Bluehost WordPress site is optimized and secure.
Creating And Publishing Content
Creating and publishing content is the heart of any successful Bluehost WordPress site. This is where you connect with your audience through engaging posts and pages. Let’s dive into the steps for writing and sharing your content.
Writing Posts And Pages
Begin by logging into your WordPress dashboard. Navigate to the left-hand menu. Click on Posts to write a new blog post. For static content, click on Pages.
To start a new post, select Add New. A new editor screen will appear. Here, you can add a title and your content. Use the toolbar to format text, create lists, and add links.
For pages, the process is similar. Click on Add New under Pages. Enter your title and content. Pages are great for permanent content like About Us or Contact pages.
Once your content is ready, click on the Publish button. This makes your post or page live for everyone to see.
Adding Media
Media adds visual appeal to your content. It can be images, videos, or audio files. To add media, click on Media in the left-hand menu. Then, select Add New.
Upload your media files from your computer. Once uploaded, you can add them to any post or page. In the post editor, click on Add Media. Choose the file you uploaded and insert it into your content.
Adding media makes your posts and pages more engaging. It breaks up text and keeps readers interested.
Remember to optimize your media files. Use descriptive file names and alt text. This helps with SEO and makes your site more accessible.
Making Your Site Live
After setting up your WordPress site on Bluehost, it’s time to make your site live. This means that everyone can see your site. Follow these steps to ensure a smooth launch.
Removing The Coming Soon Page
Bluehost activates a “Coming Soon” page by default. This keeps your site hidden while you work. To remove this page:
- Log in to your WordPress dashboard.
- Go to Bluehost menu on the left-hand side.
- Click on Settings.
- Find the Coming Soon Page toggle.
- Switch it off to remove the page.
Your site is now visible to everyone.
Final Checklist Before Going Live
Before you make your site live, complete this checklist:
| Task | Description |
|---|---|
| Check Content | Ensure all pages have content. Check for typos and errors. |
| Test Links | Click on links to check if they work. |
| Optimize Images | Compress images for faster load times. |
| SEO Settings | Use SEO plugins. Add meta titles and descriptions. |
| Mobile Friendly | Check if your site looks good on mobile devices. |
Completing this checklist ensures your site is ready for visitors.
Frequently Asked Questions
How Do I Make My Bluehost WordPress Site Live?
To make your Bluehost WordPress site live, publish your website by removing any maintenance mode plugins, update your DNS settings, and ensure your domain is pointed to Bluehost servers.
How Can I Remove Maintenance Mode On WordPress?
To remove maintenance mode, deactivate any maintenance mode plugins. Go to the WordPress dashboard, navigate to “Plugins,” and disable the maintenance mode plugin.
How Do I Update Dns Settings On Bluehost?
To update DNS settings, log in to your Bluehost account, go to “Domains,” select your domain, and update the DNS settings to point to Bluehost.
What Steps To Launch A Bluehost WordPress Site?
To launch your site, ensure your content is ready, remove maintenance mode, update DNS settings, and verify your domain points to Bluehost.
Conclusion
Making your Bluehost WordPress site live is easier than you think. Follow the steps we discussed. First, set up your domain. Next, install WordPress through Bluehost. Customize your site with a theme. Finally, publish your content. Test your site to ensure everything works.
Share your site with friends and family. Enjoy your new online presence. Happy blogging!
