

Creating a website can seem daunting. Hostinger Website Builder makes it easy.
Hostinger Website Builder offers an intuitive platform for building websites. Whether for a blog, online store, or portfolio, it simplifies the process. No need for coding skills or technical knowledge. The drag-and-drop feature helps you design your site effortlessly. You can choose from various templates to match your style.
This tool is perfect for beginners and professionals alike. In this guide, you’ll learn how to use Hostinger Website Builder step-by-step. This will help you get your site up and running quickly. Let’s dive in and explore how to create your dream website with ease.
Credit: www.hostinger.com
Introduction To Hostinger Website Builder
The Hostinger Website Builder is a powerful tool. It helps users create stunning websites with ease. Even beginners can make professional websites in no time. Let’s dive into what makes Hostinger special and why it’s a great choice.
What Is Hostinger?
Hostinger is a web hosting provider. It offers various services, including shared hosting, VPS hosting, and cloud hosting. Hostinger is known for its affordable plans and excellent customer support. It also provides a user-friendly website builder.
Why Choose Hostinger Website Builder?
There are many reasons to choose Hostinger Website Builder. Here are some of the key benefits:
- Easy to Use: The drag-and-drop interface is simple and intuitive.
- Affordable: Hostinger offers competitive pricing.
- Responsive Designs: Websites look great on all devices.
- SEO Tools: Built-in tools help improve search engine rankings.
- 24/7 Support: Access to expert help whenever needed.
Hostinger Website Builder also includes many templates. This makes it easy to get started. You can customize these templates to fit your needs. No coding skills are required.
Here’s a quick comparison of Hostinger’s features:
| Feature | Details |
|---|---|
| Drag-and-Drop | Yes |
| Templates | Many options |
| SEO Tools | Included |
| Responsive Design | Yes |
| Customer Support | 24/7 |
With Hostinger Website Builder, you can have a beautiful website quickly. The platform’s features and support make it an excellent choice for anyone.
Credit: www.hostinger.com
Getting Started
Starting with Hostinger Website Builder is simple and quick. This guide will help you create an account and navigate the dashboard with ease. Follow these steps to get your website up and running.
Creating An Account
First, visit Hostinger’s website. Click on the “Get Started” button. You will be prompted to enter your email address. Choose a strong password. Make sure it is easy to remember but hard to guess. Confirm your email by clicking the link sent to your inbox.
After confirming, log in to your new Hostinger account. You’ll be greeted with a welcome screen. Here, you can start building your website. Choose a plan that suits your needs. Hostinger offers various plans for different budgets.
Navigating The Dashboard
Once logged in, you’ll find yourself on the dashboard. The dashboard is your control center. You can access all the tools you need from here. On the left side, you will see a menu with different options.
Click on “Website Builder” to start designing your site. You will see templates that you can choose from. Select one that fits your style. The drag-and-drop interface makes it easy to customize your site. Add text, images, and other elements with a few clicks.
Explore other menu options like “Settings” to adjust your site’s preferences. Check the “Help” section if you need assistance. Hostinger’s dashboard is designed to be user-friendly. You will find it easy to navigate.
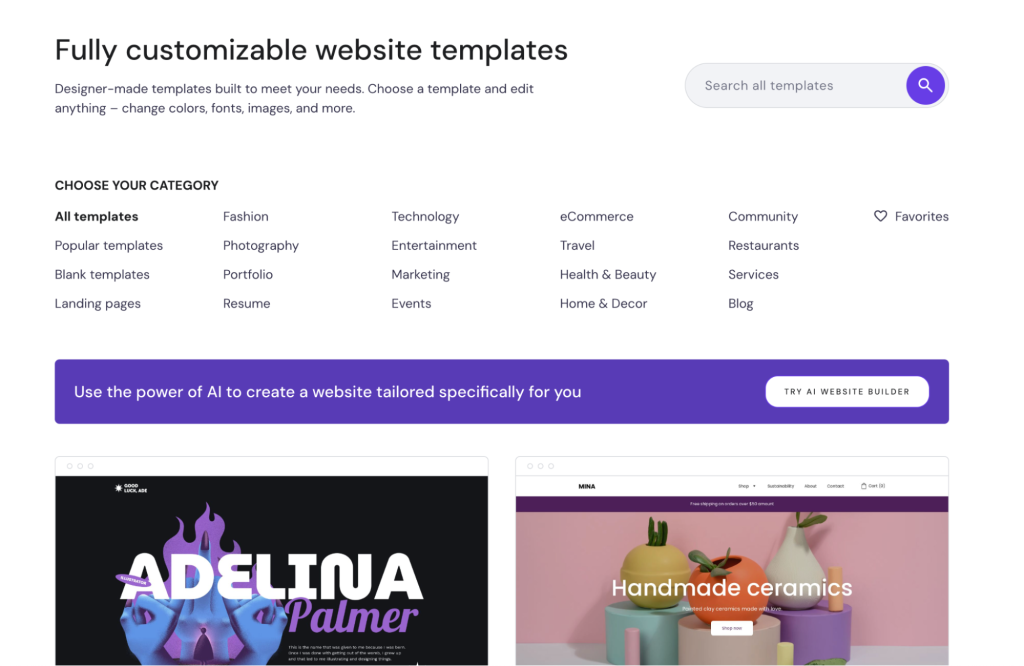
Choosing A Template
Selecting a template with Hostinger Website Builder is straightforward. Choose from a variety of designs to match your site’s needs. Customize it easily to fit your style and content.
Choosing the right template is crucial for creating an appealing website. Hostinger Website Builder offers a range of templates to suit various needs. This guide will help you select and customize a template that matches your vision.
Template Categories
Hostinger categorizes templates to simplify your choice. Categories include business, portfolio, blog, and eCommerce. Each category has designs tailored to specific purposes. For example, business templates focus on professionalism. Portfolio templates highlight visual content. Blog templates emphasize readability. eCommerce templates focus on product presentation. This organization saves time and narrows down your options.
Customizing Your Template
Once you select a template, customization is key. Hostinger offers a user-friendly drag-and-drop editor. You can easily modify text, images, and colors. Personalize the layout to fit your brand. Add sections like testimonials or contact forms. Ensure the design is mobile-friendly. Preview your changes regularly. This ensures a consistent look across devices. Customization helps your website stand out.

Credit: www.youtube.com
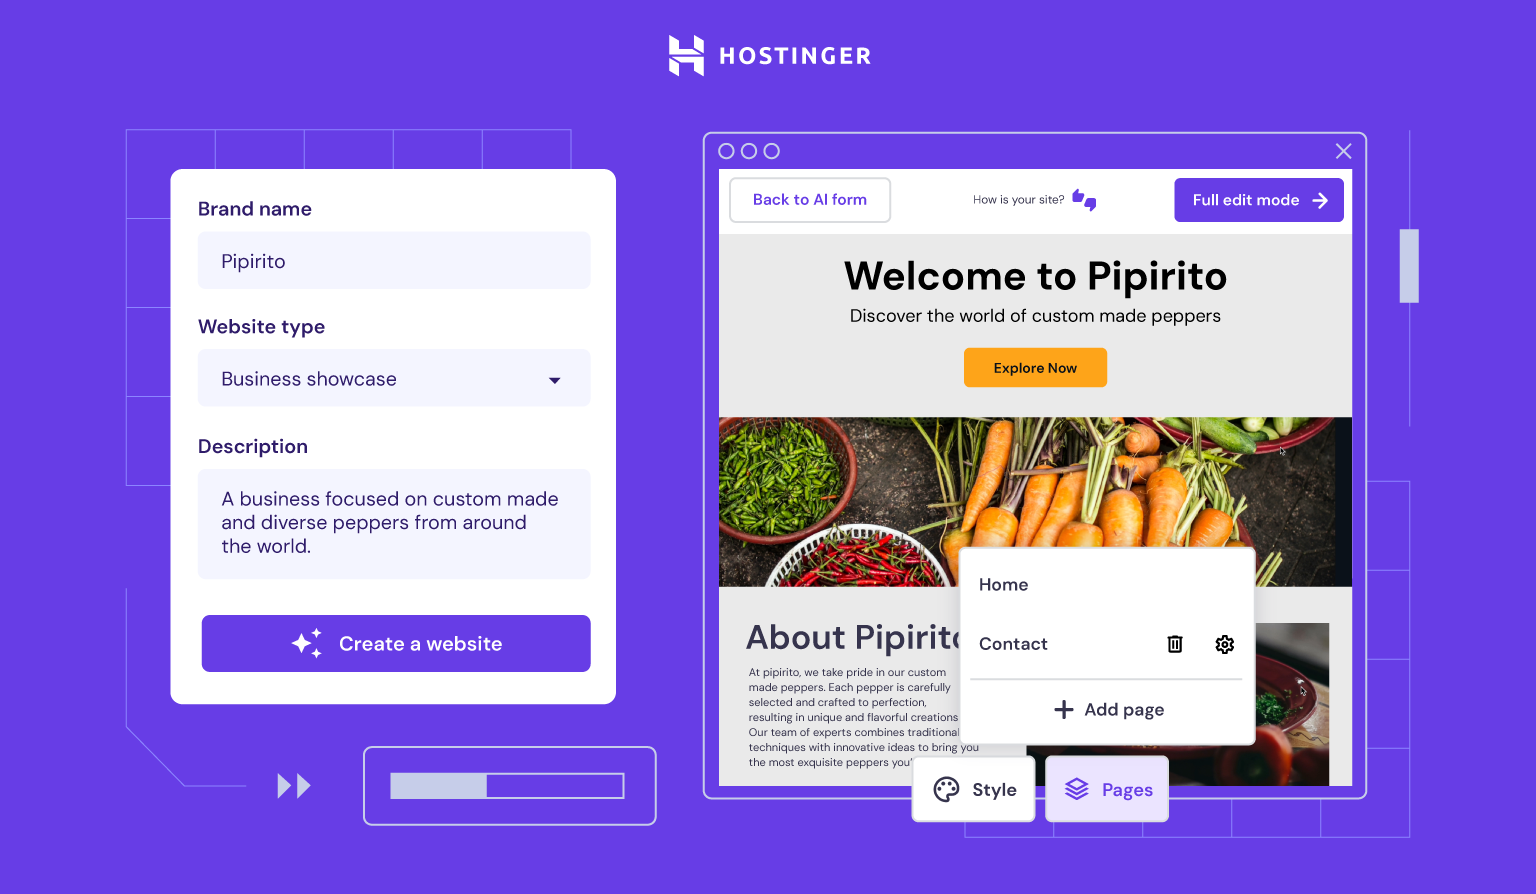
Building Your Website
Create a stunning website effortlessly with Hostinger Website Builder. Drag-and-drop tools make designing your site simple and quick. Perfect for beginners and experts alike.
Building your website with Hostinger Website Builder is a breeze. The user-friendly interface makes the process seamless. You can create a professional-looking site in no time. Let’s explore how to do it step by step.
Adding Pages
To start, you need to add pages. Click on the “Pages” tab in the editor. Here, you can manage existing pages or create new ones. Simply click “Add Page” and name it. You can create pages like Home, About, Services, and Contact. Each page serves a different purpose. Customize each page to suit your needs. Rearrange them in the order you prefer.
Incorporating Widgets
Widgets enhance your site’s functionality. They add interactive features. To incorporate widgets, go to the “Widgets” section. Drag and drop the desired widget onto your page. You can add text boxes, images, videos, and more. Each widget is customizable. Adjust settings to match your site’s style. Use widgets to engage your visitors. They make your website more dynamic and user-friendly.
With these steps, building your website with Hostinger becomes simple. Happy building!
Design And Layout
Design and Layout are crucial in creating a visually appealing website. With Hostinger Website Builder, you can craft beautiful designs effortlessly. Focus on making your site look clean and professional. Below, we’ll explore how to use the drag-and-drop feature and share some design tips and best practices.
Using The Drag-and-drop Feature
Hostinger Website Builder’s drag-and-drop feature allows you to place elements exactly where you want them. This makes it easy to build your website without coding skills.
To use this feature:
- Open the website builder.
- Select the element you want to add (text, images, buttons).
- Drag the element to your desired location on the page.
- Release the mouse button to place the element.
You can also resize and move elements to achieve the perfect layout. This feature is user-friendly and intuitive.
Design Tips And Best Practices
Creating a great design involves more than just dragging and dropping elements. Here are some tips to help you design a stunning website.
- Keep it simple: A clean and simple design makes your site look professional.
- Use a consistent color scheme: Choose a color palette that matches your brand.
- Optimize images: Use high-quality images but keep file sizes small for fast loading.
- Ensure readability: Use easy-to-read fonts and maintain good contrast between text and background.
- Make navigation easy: Ensure that visitors can easily find what they need.
Remember, the goal is to create a site that is not only beautiful but also functional and user-friendly.
Content Management
Managing content is crucial for any website. With Hostinger Website Builder, you can easily upload media and edit text and images. This helps in creating a visually appealing and informative site. Let’s explore how to handle these tasks.
Uploading Media
Uploading media is simple with Hostinger Website Builder. Follow these steps to add images, videos, and other files:
- Navigate to the Media Library in the dashboard.
- Click on the Upload button.
- Select the file(s) from your computer.
- Wait for the upload to complete.
Your media is now available for use on your website. You can add it to any page or post.
Editing Text And Images
Editing text and images is vital for keeping your content fresh. Here’s how you can do it:
Editing Text:
- Click on the text block you want to edit.
- Use the text editor that appears.
- You can change the font, size, and color.
- Click Save to apply changes.
Editing Images:
- Select the image block on your page.
- Click on the Edit button.
- You can resize, crop, or replace the image.
- Click Save to confirm the changes.
By managing content efficiently, your website will always look professional and up-to-date.
Seo And Marketing Tools
Effective SEO and marketing tools are crucial for a successful online presence. Hostinger’s Website Builder offers features that can enhance your site’s visibility and reach. Learn how to use these tools to optimize your website and attract more visitors.
Optimizing For Search Engines
Search engine optimization (SEO) helps your website rank higher on search engines. Hostinger Website Builder makes SEO easy with built-in tools.
- Meta Tags: Add meta titles and descriptions to your pages. This tells search engines about your content.
- Keywords: Research and use relevant keywords. Incorporate them naturally into your content and headers.
- Alt Text: Use alt text for images. Describe your images for better search engine indexing.
Use a clean URL structure. Simple URLs are easier for search engines to understand. Hostinger Website Builder helps you customize URLs effectively.
Utilizing Marketing Features
Marketing tools drive traffic and boost engagement. Hostinger Website Builder provides various features to market your site.
- Email Marketing: Collect email addresses with sign-up forms. Send newsletters and promotions to your subscribers.
- Social Media Integration: Link your social media accounts. Share your content across different platforms easily.
- Analytics: Track your site’s performance. Use data to understand your audience and improve your strategies.
Run special promotions or discounts. Use pop-ups and banners to grab attention and increase conversions.
With these tools, you can reach a wider audience. Engage users and grow your online presence effectively.
Publishing And Maintenance
Publishing and maintaining your website with Hostinger Website Builder is essential to keep your content updated and accessible. This section will guide you through previewing your site, publishing it, and ensuring ongoing maintenance.
Previewing Your Site
Before you publish your website, it’s crucial to preview your site. This helps you spot any errors or design flaws. Hostinger’s preview feature allows you to see how your website will appear on different devices.
- Click the Preview button at the top right corner.
- Check the layout on both desktop and mobile views.
- Ensure all links and buttons work correctly.
Make any necessary adjustments before moving to the next step.
Publishing Your Website
Once you are satisfied with your preview, it’s time to publish your website. Hostinger makes this process simple and quick.
- Click the Publish button at the top right corner.
- Select your domain name or use a free Hostinger subdomain.
- Confirm your settings and click Publish again.
Your website is now live and accessible to the public!
Ongoing Maintenance
Maintaining your website is crucial for keeping it up-to-date and secure. Regular maintenance ensures your site runs smoothly and efficiently.
| Task | Frequency |
|---|---|
| Update content | Weekly |
| Check for broken links | Monthly |
| Backup your site | Monthly |
| Update plugins and themes | Monthly |
By following these steps, you can ensure your website remains fresh and engaging for your visitors.
Frequently Asked Questions
What Is Hostinger Website Builder?
Hostinger Website Builder is a user-friendly tool for creating websites. It offers customizable templates and drag-and-drop features. No coding skills are needed.
How To Start With Hostinger Website Builder?
To start, sign up on Hostinger, choose a plan, and access the website builder. Select a template and start customizing.
Can I Use Custom Domains With Hostinger?
Yes, you can use custom domains with Hostinger Website Builder. Purchase a domain or connect an existing one.
Is Hostinger Website Builder Free?
Hostinger Website Builder offers both free and premium plans. The free plan has basic features, while premium plans offer advanced options.
Conclusion
Creating a website with Hostinger is simple and effective. The tools are user-friendly, making the process quick. You can customize your site to fit your needs. With Hostinger, you get reliability and support. Start building your website today. You will find it straightforward and rewarding.
Happy website building!
