

Canceling a Builderall subscription is simple. Follow a few steps and you’re done.
Builderall is a popular tool for online business. But sometimes, you might need to cancel. Whether you’re moving to another platform or cutting costs, knowing how to cancel is important. This guide will help you through the process. You’ll see how to cancel your Builderall subscription quickly and easily.
We’ll cover every step you need to take. By the end, you’ll be free from your subscription without any hassle. Let’s get started!

Credit: www.youtube.com
Reasons For Cancellation
There are several reasons why you might want to cancel your Builderall subscription. Understanding these reasons will help you decide if cancellation is the right step for you. Let’s explore some common issues and alternative solutions.
Common Issues Faced
Many users face technical difficulties with Builderall. This can include slow loading times, bugs, and glitches. These issues can be frustrating, especially if you rely on Builderall for your business.
Another common reason is the steep learning curve. Builderall offers many features, but learning to use them can take time. Users might feel overwhelmed and decide to cancel.
High costs also play a role. Some users find the subscription fees too high, especially if they are not using all the features. This can make Builderall seem less valuable.
Alternative Solutions
Before cancelling, consider some alternative solutions. First, reach out to Builderall customer support. They might help you resolve technical issues.
You can also look for tutorials and training resources. These can help you learn how to use Builderall more effectively. Many users find that investing time in learning can solve many of their issues.
If cost is a concern, review your subscription plan. You might switch to a lower-tier plan that fits your budget better. This way, you can still benefit from Builderall without the high costs.
Lastly, consider community forums and online groups. Many users share tips and solutions that might help you.
Pre-cancellation Checklist
Canceling a Builderall subscription requires a few steps. Ensure you have access to your account details and backup any important data before proceeding. Follow the platform’s specific instructions for cancellation to avoid any issues.
Before canceling your Builderall subscription, follow a few important steps. This will ensure you don’t lose valuable data or face unexpected charges.Backup Important Data
Ensure you save all your critical information. Download website files, customer lists, and any important documents. This avoids losing work after cancelation. Consider using cloud storage or an external drive. These methods keep your data secure and accessible.Review Billing Cycle
Check your billing cycle date. This helps avoid extra charges. If you cancel mid-cycle, you might not receive a full refund. Plan your cancelation near the end of the cycle. This maximizes your service period and minimizes costs. Review any pending invoices. Ensure all dues are cleared. This prevents future billing issues. “`Cancellation Process
The process of canceling your Builderall subscription is simple. Follow these steps to ensure a smooth cancellation. This guide will help you navigate the process effortlessly.
Accessing Account Settings
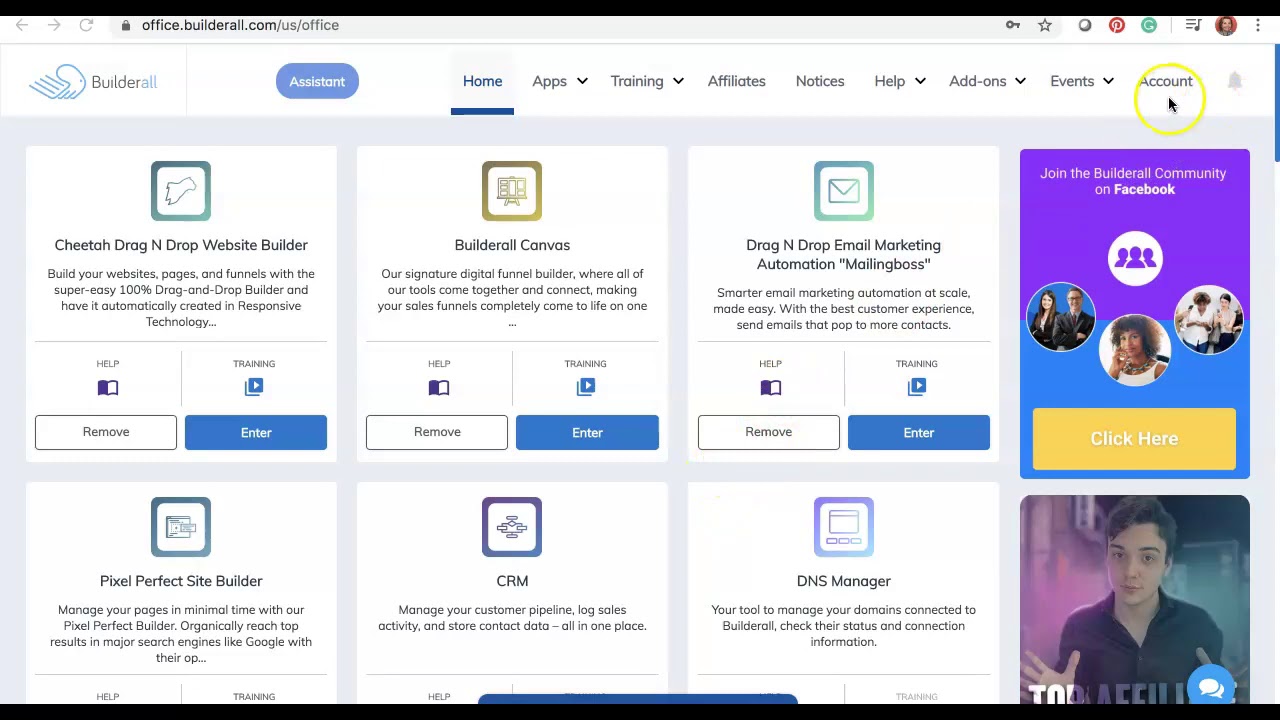
First, log into your Builderall account. Use your email and password. Once logged in, locate your profile picture. It’s usually at the top right corner. Click on it to open a dropdown menu. Select “Account Settings” from the menu.
Navigating To Subscription Section
In the Account Settings, find the “Billing” tab. Click on it. This will take you to the billing information page. Look for the “Subscription” section. It shows your current plan details. Find the “Cancel Subscription” button. Click on it to start the cancellation process.
Credit: www.youtube.com
Completing Cancellation
Completing the cancellation of your Builderall subscription is a straightforward process. You need to confirm your request and receive the confirmation email. Follow these steps to ensure the cancellation is fully processed.
Confirming Cancellation Request
After submitting your cancellation request, a confirmation screen appears. This screen asks if you are sure about canceling. Click on the “Confirm” button to proceed. This step ensures that you do not accidentally cancel your subscription.
Receiving Confirmation Email
Once your request is confirmed, check your email for a confirmation message. This email serves as proof of your cancellation. Keep it for your records. If you do not see the email, check your spam or junk folder. Contact Builderall support if the email does not arrive within a few hours.
Post-cancellation Steps
After canceling your Builderall subscription, there are a few crucial steps you should take. These steps ensure a smooth transition and prevent any future complications. Below, we outline these steps to help you manage your Builderall exit effectively.
Revoke Access To Tools
Once you cancel your Builderall subscription, it’s important to revoke access to all the tools. This prevents unauthorized use and helps secure your data. Follow these steps:
- Log into your Builderall account.
- Navigate to the “Account Settings” section.
- Click on “Manage Tools” or a similar option.
- Disable each tool you no longer need.
Ensure that you have backed up any important data before revoking access. This way, you won’t lose valuable information.
Update Payment Methods
After canceling, update your payment methods to avoid any unwanted charges. Here’s how you can do it:
- Go to your Builderall account dashboard.
- Click on “Billing Information” or “Payment Methods.”
- Remove the current payment method linked to your Builderall account.
- Add a new payment method if necessary for other services.
By updating your payment details, you prevent future billing issues. It also ensures your financial information remains secure.
Common Issues And Solutions
Canceling a Builderall subscription can sometimes be tricky. Users often face common issues, but solutions are available. This section addresses these issues and provides clear solutions.
Troubleshooting Errors
Errors during cancellation can be frustrating. Below are some common errors and their solutions:
| Common Error | Solution |
|---|---|
| Unable to locate the cancellation option | Check your account settings. Look for the “Billing” or “Subscription” tab. |
| Error message during cancellation | Clear your browser cache and cookies. Try again. |
| Subscription not showing as canceled | Log out and log back in. Check the subscription status again. |
Contacting Support
If troubleshooting fails, contacting support is the next step. Follow these simple steps:
- Visit the Builderall Help Center.
- Submit a support ticket.
- Provide detailed information about your issue.
- Wait for a response from the support team.
Be sure to include your account details. This helps the support team resolve your issue quickly.
Reactivating Subscription
Cancelling a Builderall subscription is easy. But what if you want to come back? Reactivating your subscription can be just as simple. Let’s explore how to get your account back up and running.
Rejoining Process
Follow these steps to reactivate your Builderall subscription:
- Log in to your Builderall account.
- Navigate to the Account section in the dashboard.
- Click on Subscription to see your options.
- Choose the plan you wish to reactivate.
- Confirm your payment details.
- Click Reactivate to complete the process.
Your account should now be active. You can start using Builderall tools right away.
Restoring Previous Settings
Wondering if your old settings will come back? Good news! Here’s how to restore them:
- Go to the Settings tab in your dashboard.
- Click on Restore Previous Settings.
- Review the list of previous settings saved.
- Select the settings you want to restore.
- Click Apply to confirm your selection.
Your previous settings will now be active again. Enjoy a seamless transition back to Builderall.
Reactivating your Builderall subscription is straightforward. With these steps, you can get back to building your online presence in no time.
Credit: support.builderall.de
Frequently Asked Questions
How Do I Cancel My Builderall Subscription?
To cancel your Builderall subscription, log in to your account. Navigate to the billing section. Find the subscription plan and click “Cancel. ” Follow the on-screen instructions to confirm the cancellation.
Can I Get A Refund After Cancellation?
Builderall’s refund policy allows for refunds within 30 days of purchase. If eligible, contact customer support to request a refund. Provide necessary details for processing.
What Happens To My Data After Cancellation?
After canceling, your data will be retained for a limited time. Ensure you back up important information. Contact Builderall support for specific data retention policies.
Is There A Cancellation Fee For Builderall?
There is no cancellation fee for terminating your Builderall subscription. You can cancel anytime without incurring extra charges. However, be aware of the refund policy terms.
Conclusion
Canceling your Builderall subscription is simple with these steps. Log in and go to the billing section. Follow the on-screen instructions to cancel. Ensure you receive a confirmation email. Save it for your records. Need help? Contact Builderall support for assistance.
Now, you can move on without hassle. Thanks for reading, and good luck with your future projects!
